Overview
How Email Templates work
Templates allow you to create different styles of how the messages are sent to the attendees. You are able to clone an existing template, and then make the modification as well as create an entirely new templates.
Considerations
Not every email template listed here will be available for your setup. Based on your setup options are enabled and disabled.
Menu Location
From the left side menu, click on the Templates, then click Email.
If you do not see this option, then you must enable the Email services.
Template Main Selection
When you first open the template selection screen, you have several email types available.
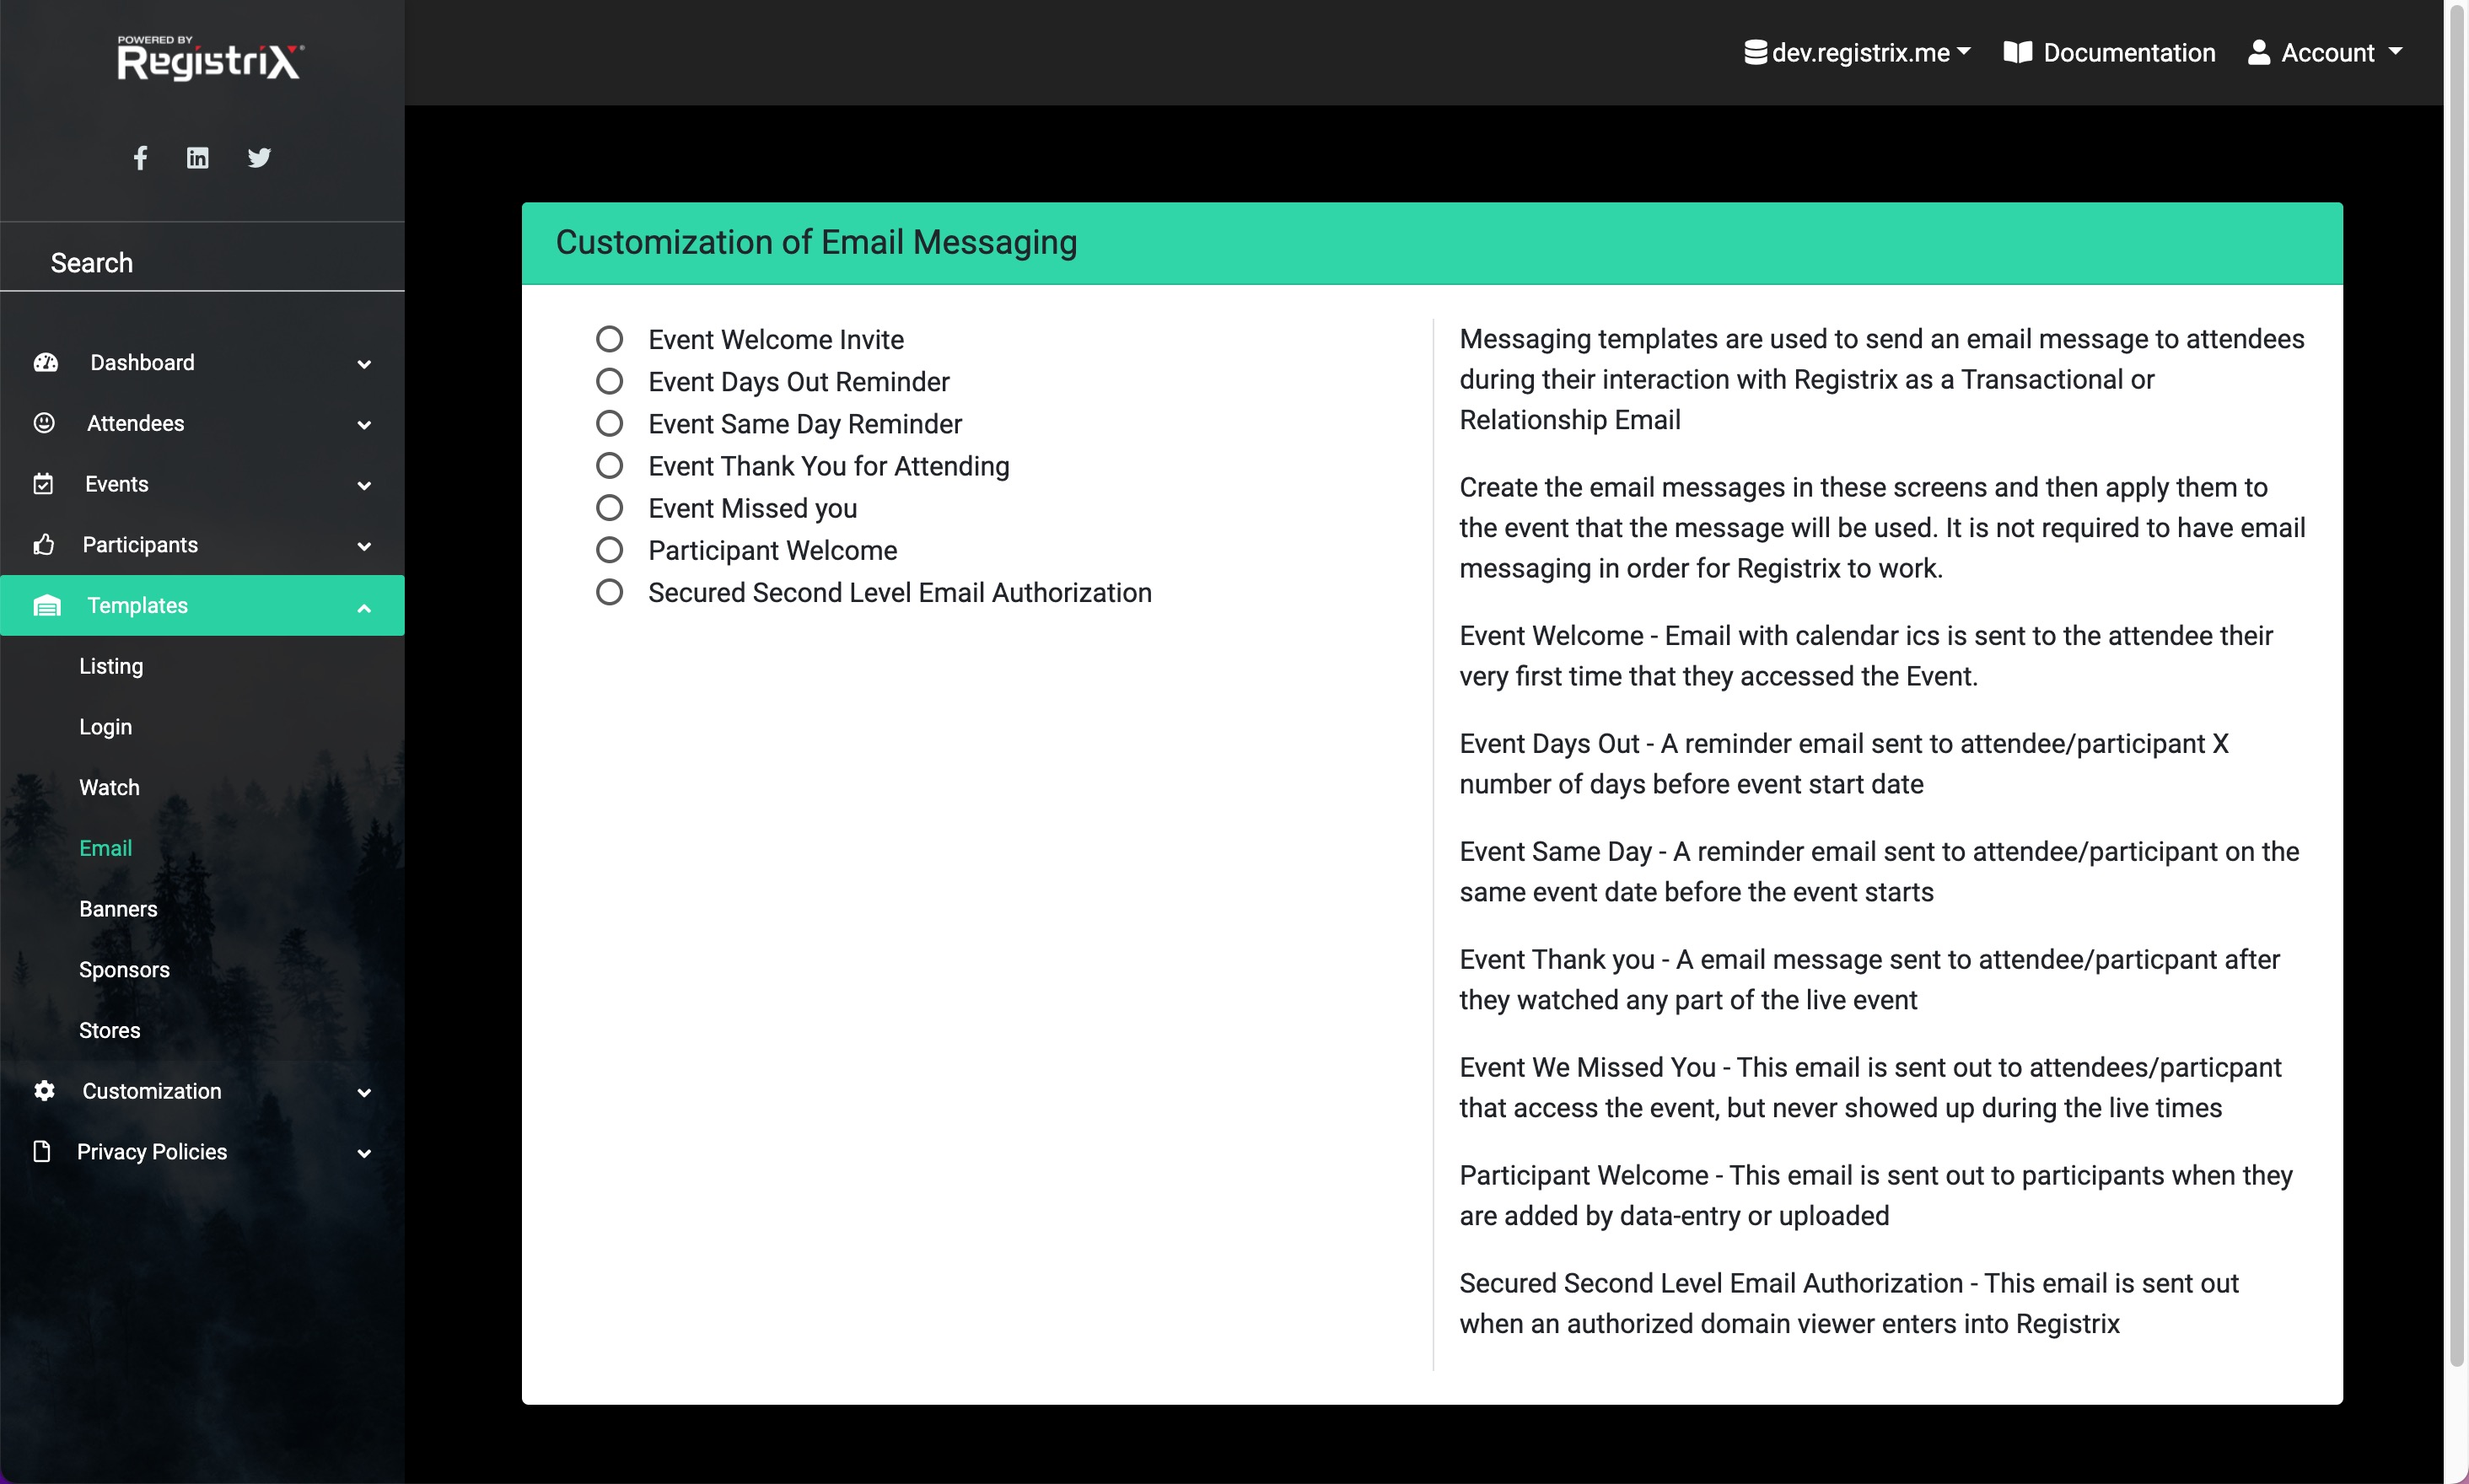
Using the mouse or trackpad click on the radio button of the email type and then another section will appear with options to work with the message.
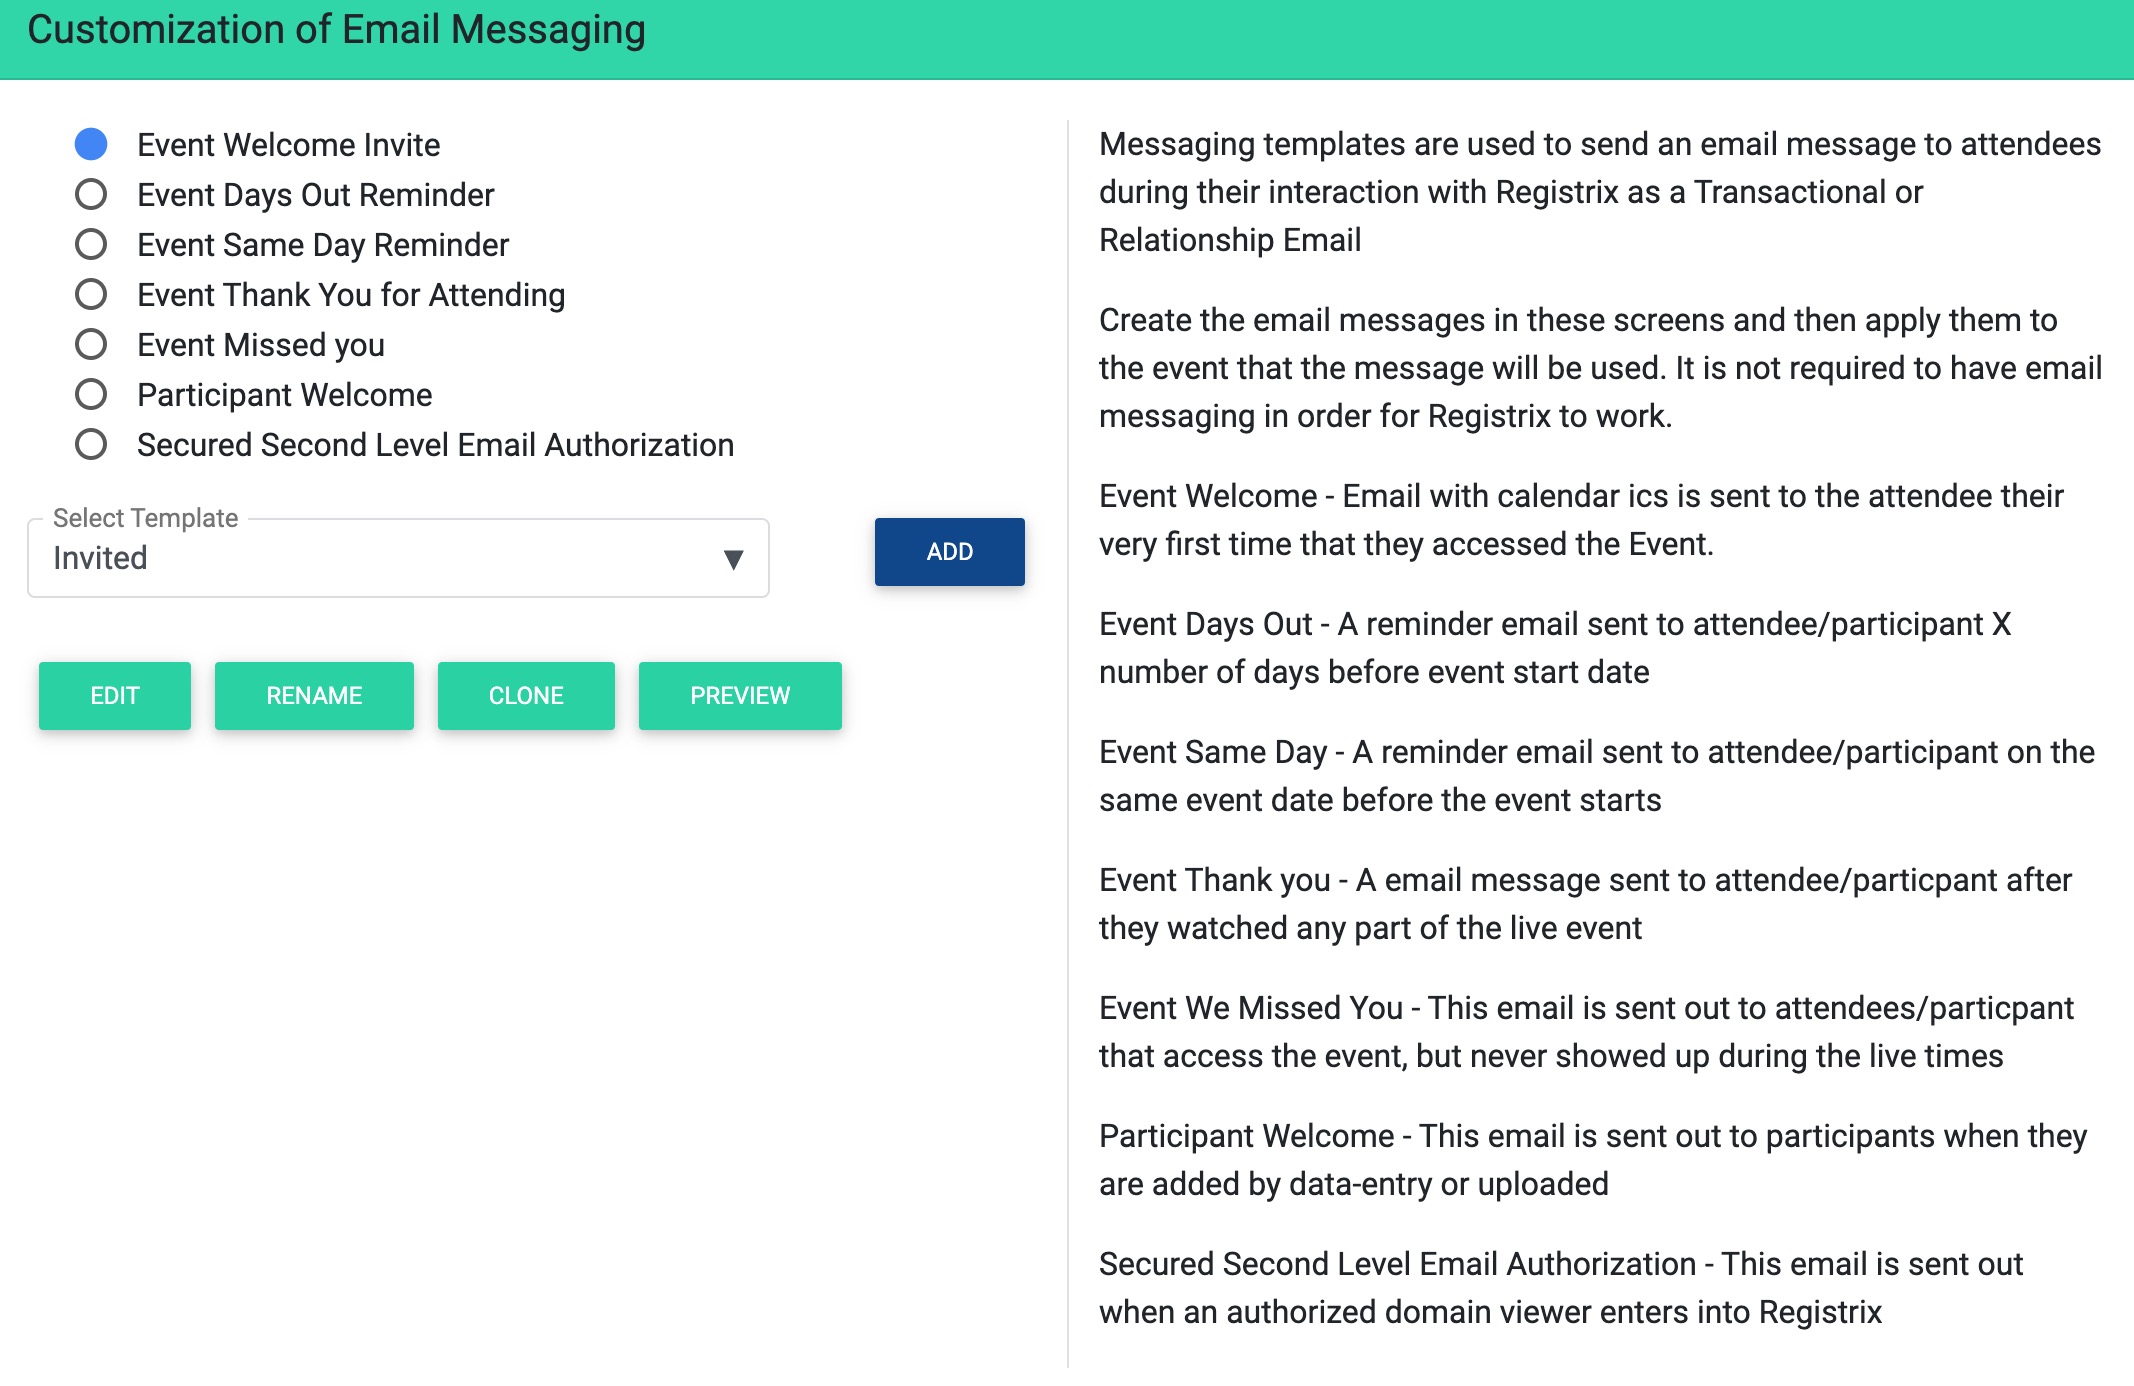
Using the Select Template in the drop down and then click on
Edit This will open a new window that allows make edits to the email message.
Rename This will open a new screen will allow you to rename the email template.
Clone This will create a duplicate of the email template.
Preview This will open a new screen that will allow you to send an preview email message to an email address.
Add will create a blank email template.
Editing Template Message
There are several different sections to edit on the email message. To begin editing of a section, click on the Gear icon.
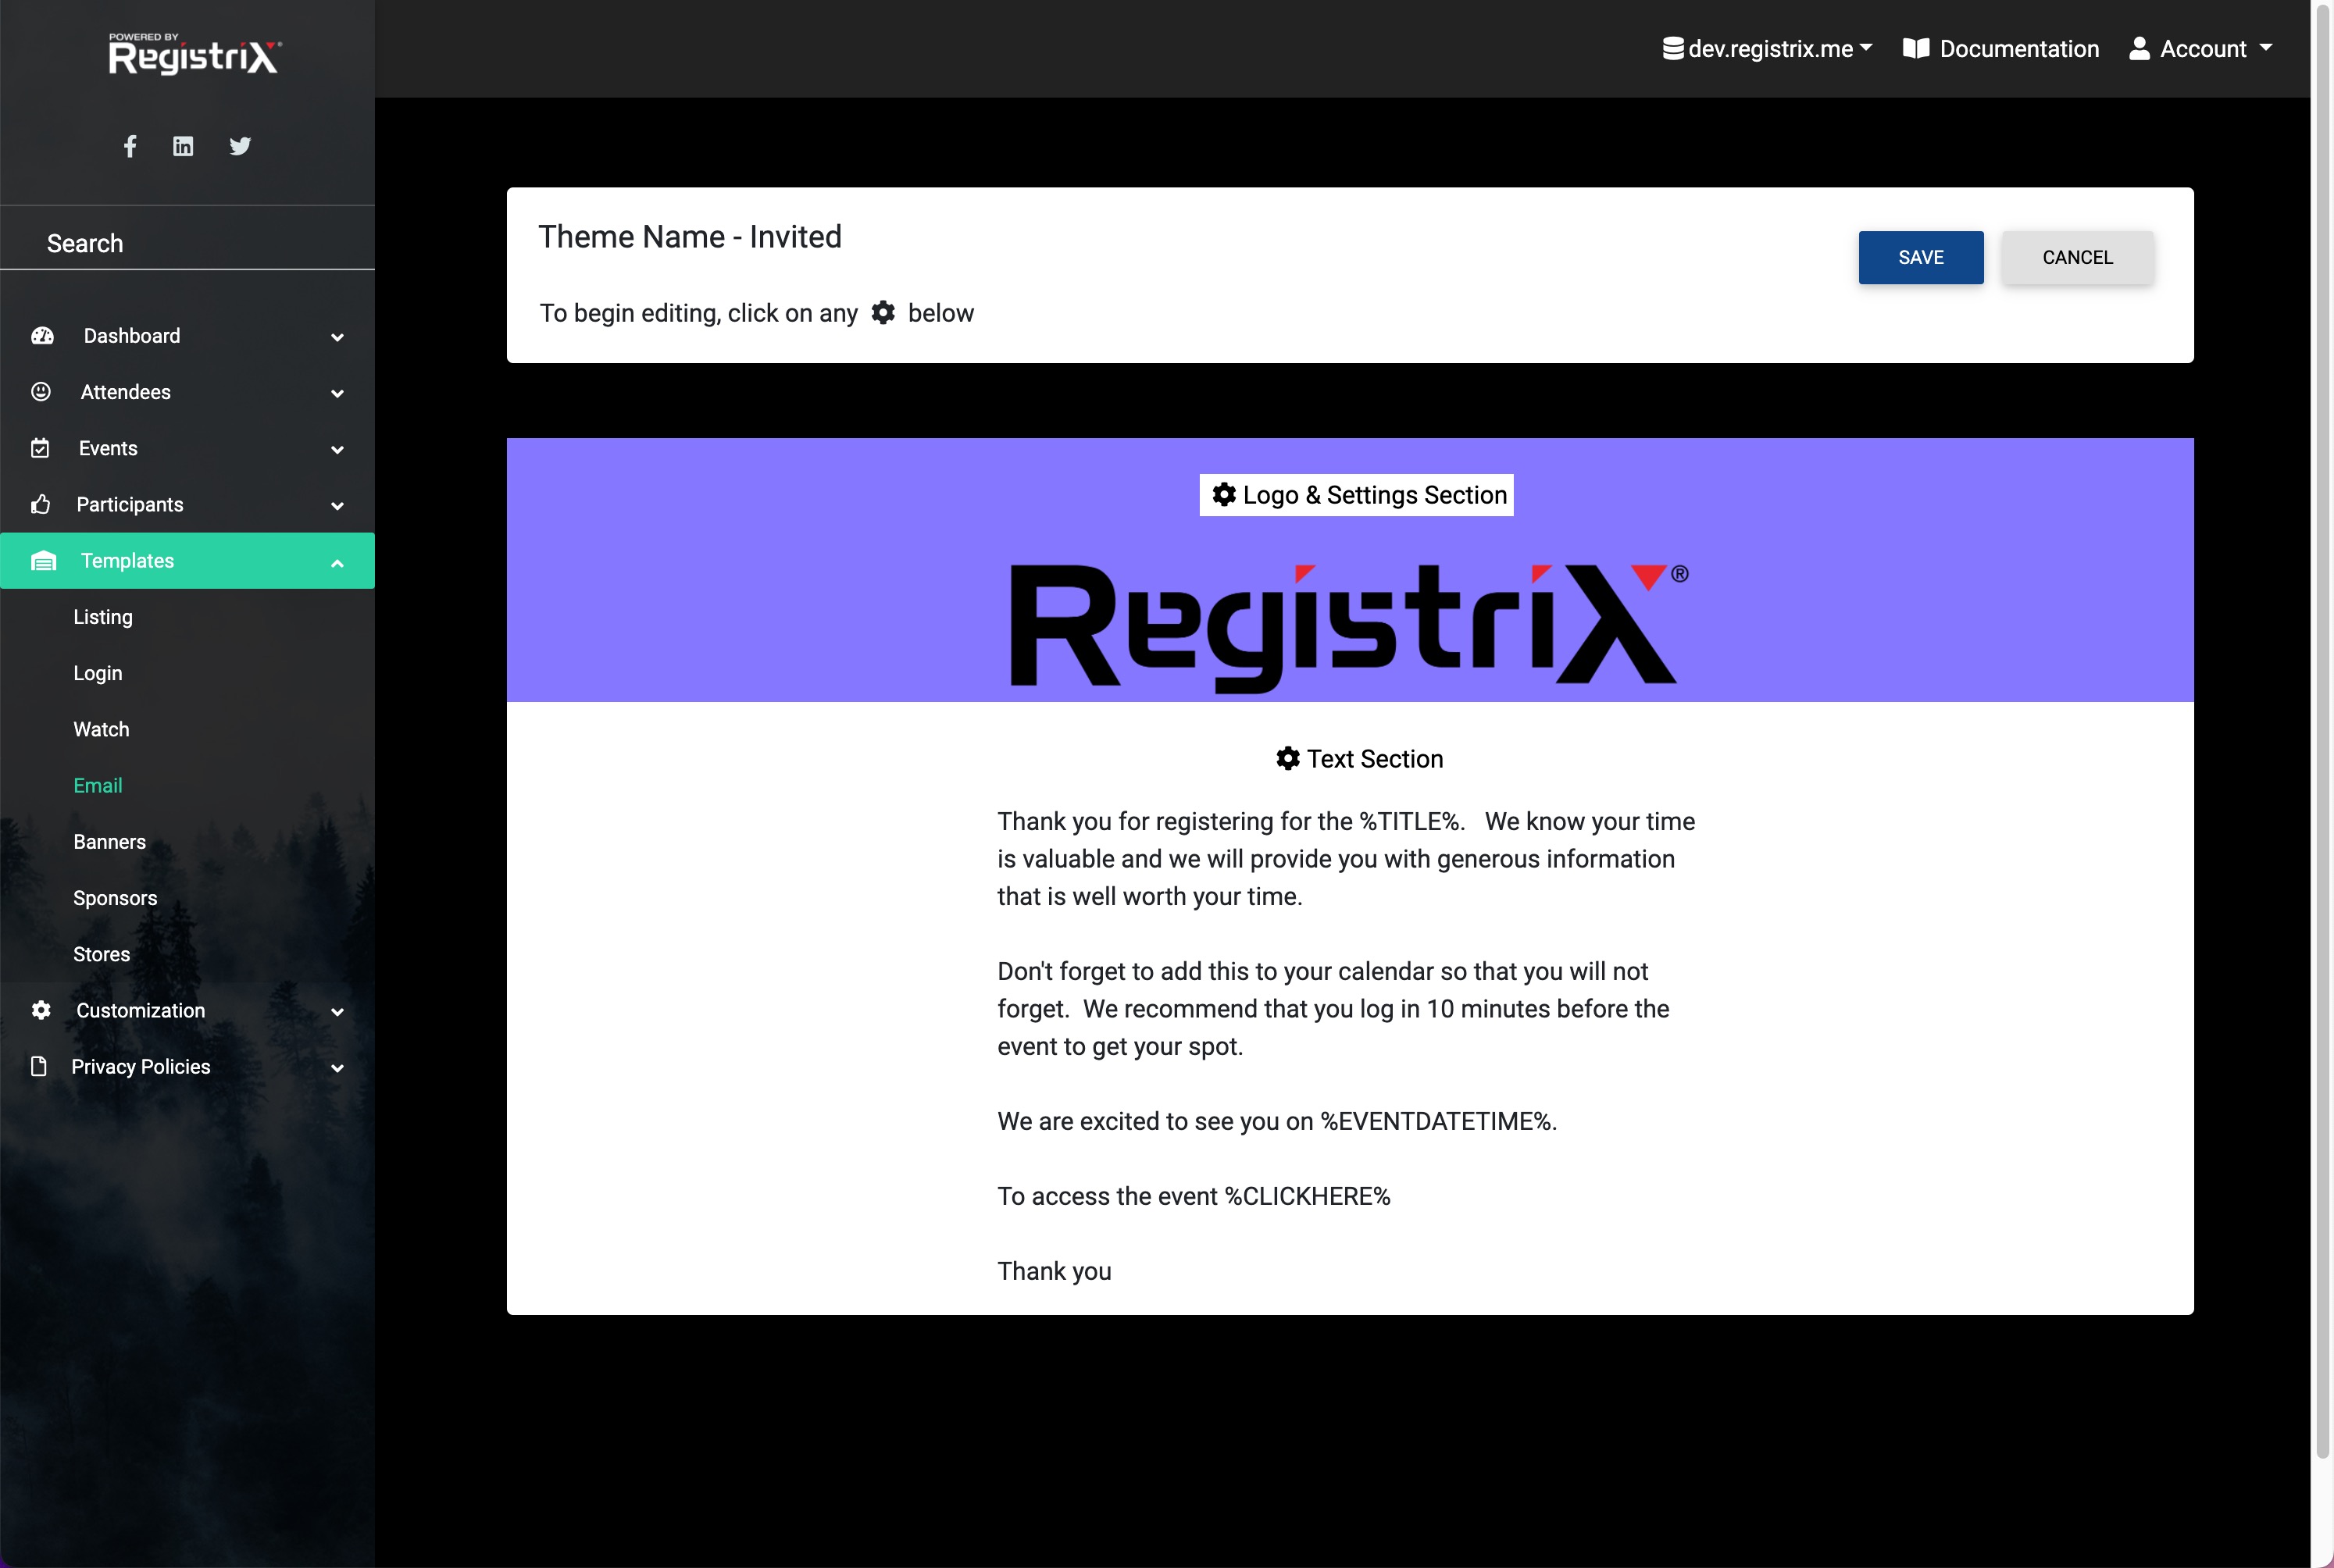
Logo & Settings Section
Enter a Sender Name (ie: "Production Manager") This is the name that will be visible to the attendee's email system as the "from" name.
Enter a Subject Line in the text box, which will be in the attendees subject line of the email message.
Using the slider tool you can specify the width of the email message from 300px to 600px. You can leave this at 600px.
You can select a background color to use based on your companies requirements for the logo branding.
If your logo isn't in the list box, click on the New button and in the popup window, drag and drop a logo image file and then click on the Upload button. The logo will now appear in the template box. Click the Close button to the lower right side of the slider window.
Text Section
A new slider window will appear that will allow you to start entering text that you want to have written up to the attendee.
In your message you will need to add in shortcodes for the attendee to gain information about their account. To do this click on the Copy icon in the shortcodes area and then in the Text editor, paste this shortcode into the box.
Sample Message
Thank you for registering for the %TITLE%.

%DESCR%

Don't forget to add this to your calendar so that you will not forget.

We recommend that you log in 10 minutes before the event to get your spot.

We are excited to see you on %EVENTDATETIME%.
To access the event %CLICKHERE%

Thank you